

 Reply With Quote
Got some better pics today with the rack chopped down.


 Volkswagen Fan


cheers for the nice comments
Yeah Im glad I changed the colour. Matches so much better now. I think I'll chop a bit off the roof rack tomorrow. I was going to refurb and paint it but it kinda matches the ratty look of the car
Volkswagen Fan
Got some better pics today with the rack chopped down.
Volkswagen Enthusiast

your car is such a babe...
2012 Ford Focus - Panther Black
Previous - 1977 VW Golf GLS - 2E (beige beast)
Previous - 1976 VW Golf Ls (flipper blue)
VWwA Clown
VWwA Super Moderator

nice one fellachopped rack looks dope
VW: it aint just a car, its a way of life
There are few things more satisfying in life than finding a solution to a problem and implementing it
My Blog: tinkererstales.blogspot.com.au
Volkswagen Fan
thanks
I think its needing a new fuel pump now thoughAnd it definitely need a carb mount as its drawing in air. never mind!
Volkswagen Fan
Rebuild time! Thoughtn id share pics of the work I have done recently to the 4 door.
In the garage and partially stripped. I need it for the winter again and it needs lots of welding to pass its MOT. Most of it was just cosmetic though. Then I'll spray it and stick some new wheels onSome of this is copied from another forum so it might not make sense... But anyway...
I got the o/s/f inner wing top finished. Took some pics along the way.
It all crumbled at the top so a lot had to be cut out.
Cut out the rot
New piece shaped and welded in
Welded this piece in which connects the scuttle to the inner wing
Then went over it with the flap wheel.
Just need to make holes and weld in captives for the wing bolts
O/s inner wing is now finished
Volkswagen Fan
Cleaned up
Rot cut out
New piece welded into the crossmember as it had rusted away completely
L-piece between front panel and inner wing welded in
Cut and welded thin strips to mark out the curve
Corner piece shaped and welded in. I tried to get it as near to the original shape as possible.
Wing mounting tab piece shaped and welded and front panel repaired
Just needs skim of filler now.
Gaps looking good.
Then got the car on skates. Its so much easier to move it about.

Volkswagen Fan
Finished work on the n/s inner wing and the front panel is now finished. Turns out it was just as bad at the front as the other side. Few pics..
I decided to tackle the front of the o/s sill
As you can see it was all holed and thin.
So I cut it all out. And there was a bit of surface rust on the inner sill so i rubbed it down and treated it.
I wanted to keep the original shape so after making it up in 3 pieces I tacked it all on

Volkswagen Fan
Welded up and ground down with the flap wheel
Primed for now to stop it rusting
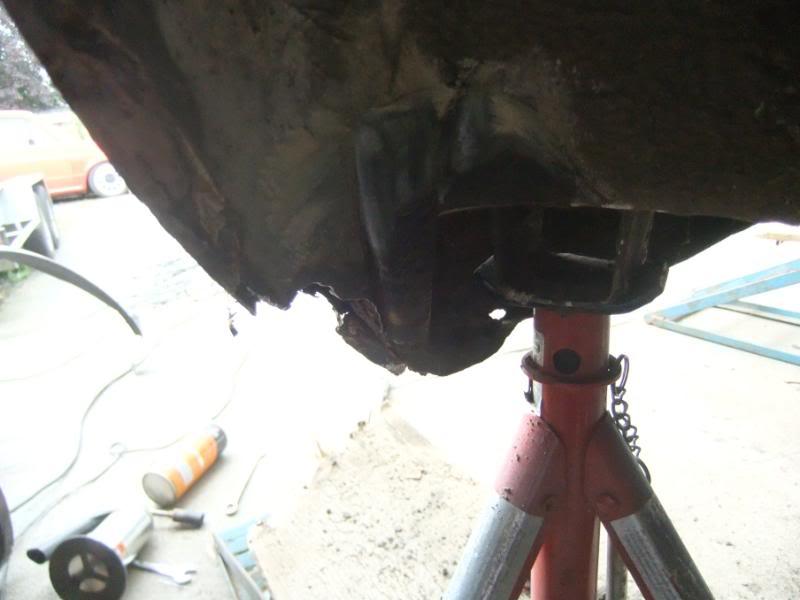
The other side is worse. I think I'll need to replace part of the floor....
Also a pic of the finished front panel primed for now.
And before and after pics of the engine bay. Alloy wheel cleaner works a treat in there

Volkswagen Fan
Update
Got more done today. Tackled the o/s rear inner and outer arches. First time I have replaced arches so I didnt know how it was going to go
Rot behind the rear wheel
Cut out
New pieces welded in
Rot infront of rear wheel
Cut out. I havent fixed this yet as I had to get the arches on first
Arch cut out 8O
New inner offered up.
Cut and tacked on.
Seam welded and ground down

 Posting Permissions


Bookmarks